I've been antsy to decorate our new house but can't yet since we aren't moved in. So in order to get an idea of what I'm looking for, I made mood boards using PowerPoint! Which is much cheaper to use than other programs but not directly made for this type of work. So today I'm sharing how I made it work for me!
1- Start off with a blank slide and save or copy photos you like. Sometimes I have to screen shot because I can't copy or save the photo. If you're going to use the photos anywhere publicly you'll probably have to link where they are from or note they aren't yours. To screen shot a specific thing (not just the entire screen on a mac) use command+shift+4. Or you can crop the screenshot in PowerPoint.
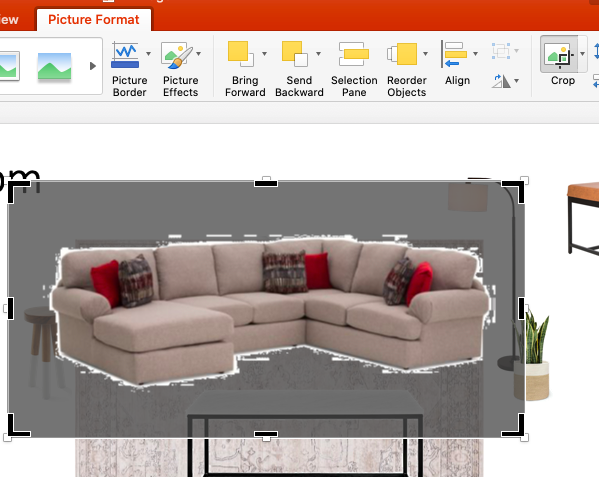
2- I try to find items with plain white backgrounds because you can easily get rid of the background and lay the board out nicely. On a Mac, you hit "picture format"- then the side arrow on the "color" icon- and then "set transparent color" and tab the white back ground. Most of the time if it's a solid background, it should leave the object as the focal point. I'm sure it's the same on a PC but the icons may be laid out differently.
3- Next you'll want to lay out your design and then use the "bring to the front" and "send to the back" tools to get like your couch in front of the rug, etc. You can also use the flip tool (on the far right here) to mirror objects if they aren't facing the right way.
4- Get to designing!! I'm sharing a few of my boards below. Once you get the hang of it, it's pretty simple and you can get really creative! You can add paint back grounds, wallpaper, put labels on each slide, etc. I even used paint to change the color of chair legs in one slide (not my best work lol) but it works. I'm obsessed!
Boards are my own- but items on the boards are not my pictures.


1F9E8B91E1
ReplyDeletesteroid satın al
Telegram Show Kanalı
steroid al